
从零开始学昇腾Ascend C算子开发-实战项目-第七篇:Hello World第一个Ascend C算子
本文介绍了Ascend C算子开发的两个基础示例。第一部分展示了"Hello World"算子的实现,通过简单的核函数打印验证开发环境正常。第二部分详细讲解了Add算子的开发流程,包括数据加载、计算和结果写回的核心步骤,展示了类封装、流水线处理等技术要点。两个示例完整呈现了Ascend C算子从环境验证到实际计算的全过程,为开发者提供了基础开发模板。
7.1 Hello World:第一个Ascend C算子
7.1.1 项目概述
Hello World是最简单的Ascend C算子示例,它不进行任何计算,只是在NPU上打印"Hello World",用来验证开发环境是否正常,以及核函数能否在NPU上运行。
7.1.2 代码实现
基于samples中的0_helloworld示例,代码非常简单:
#include "kernel_operator.h"

extern "C" __global__ __aicore__ void hello_world()
{
    AscendC::printf("Hello World!!!\n");
}

void hello_world_do(uint32_t blockDim, void *stream)
{
    hello_world<<<blockDim, nullptr, stream>>>();
}
关键点解析:
extern "C":告诉编译器用C语言链接方式,这样Host端才能调用。
__global__:表示这是全局核函数,可以从Host端调用。
__aicore__:表示这个函数在AI Core上执行。
AscendC::printf:Ascend C提供的打印函数,可以在NPU上输出信息。
<<<>>>:这是核函数调用符,类似CUDA的语法,用来启动核函数。
7.1.3 Host端调用
Host端调用也很简单:
#include "acl/acl.h"
extern void hello_world_do(uint32_t coreDim, void *stream);

int32_t main(int argc, char const *argv[])
{
    aclInit(nullptr);
    int32_t deviceId = 0;
    aclrtSetDevice(deviceId);
    aclrtStream stream = nullptr;
    aclrtCreateStream(&stream);

    // 8个Core并行执行
    constexpr uint32_t blockDim = 8;
    hello_world_do(blockDim, stream);
    aclrtSynchronizeStream(stream);

    aclrtDestroyStream(stream);
    aclrtResetDevice(deviceId);
    aclFinalize();
    return 0;
}
流程说明:初始化ACL、设置设备、创建流、启动核函数、同步等待、清理资源。这是调用Ascend C算子的标准流程。
7.1.4 编译和运行
在ModelArts Notebook中,可以直接编译运行:
cd samples/operator/ascendc/0_introduction/0_helloworld
bash run.sh -v Ascendxxx  # 替换为实际的NPU型号
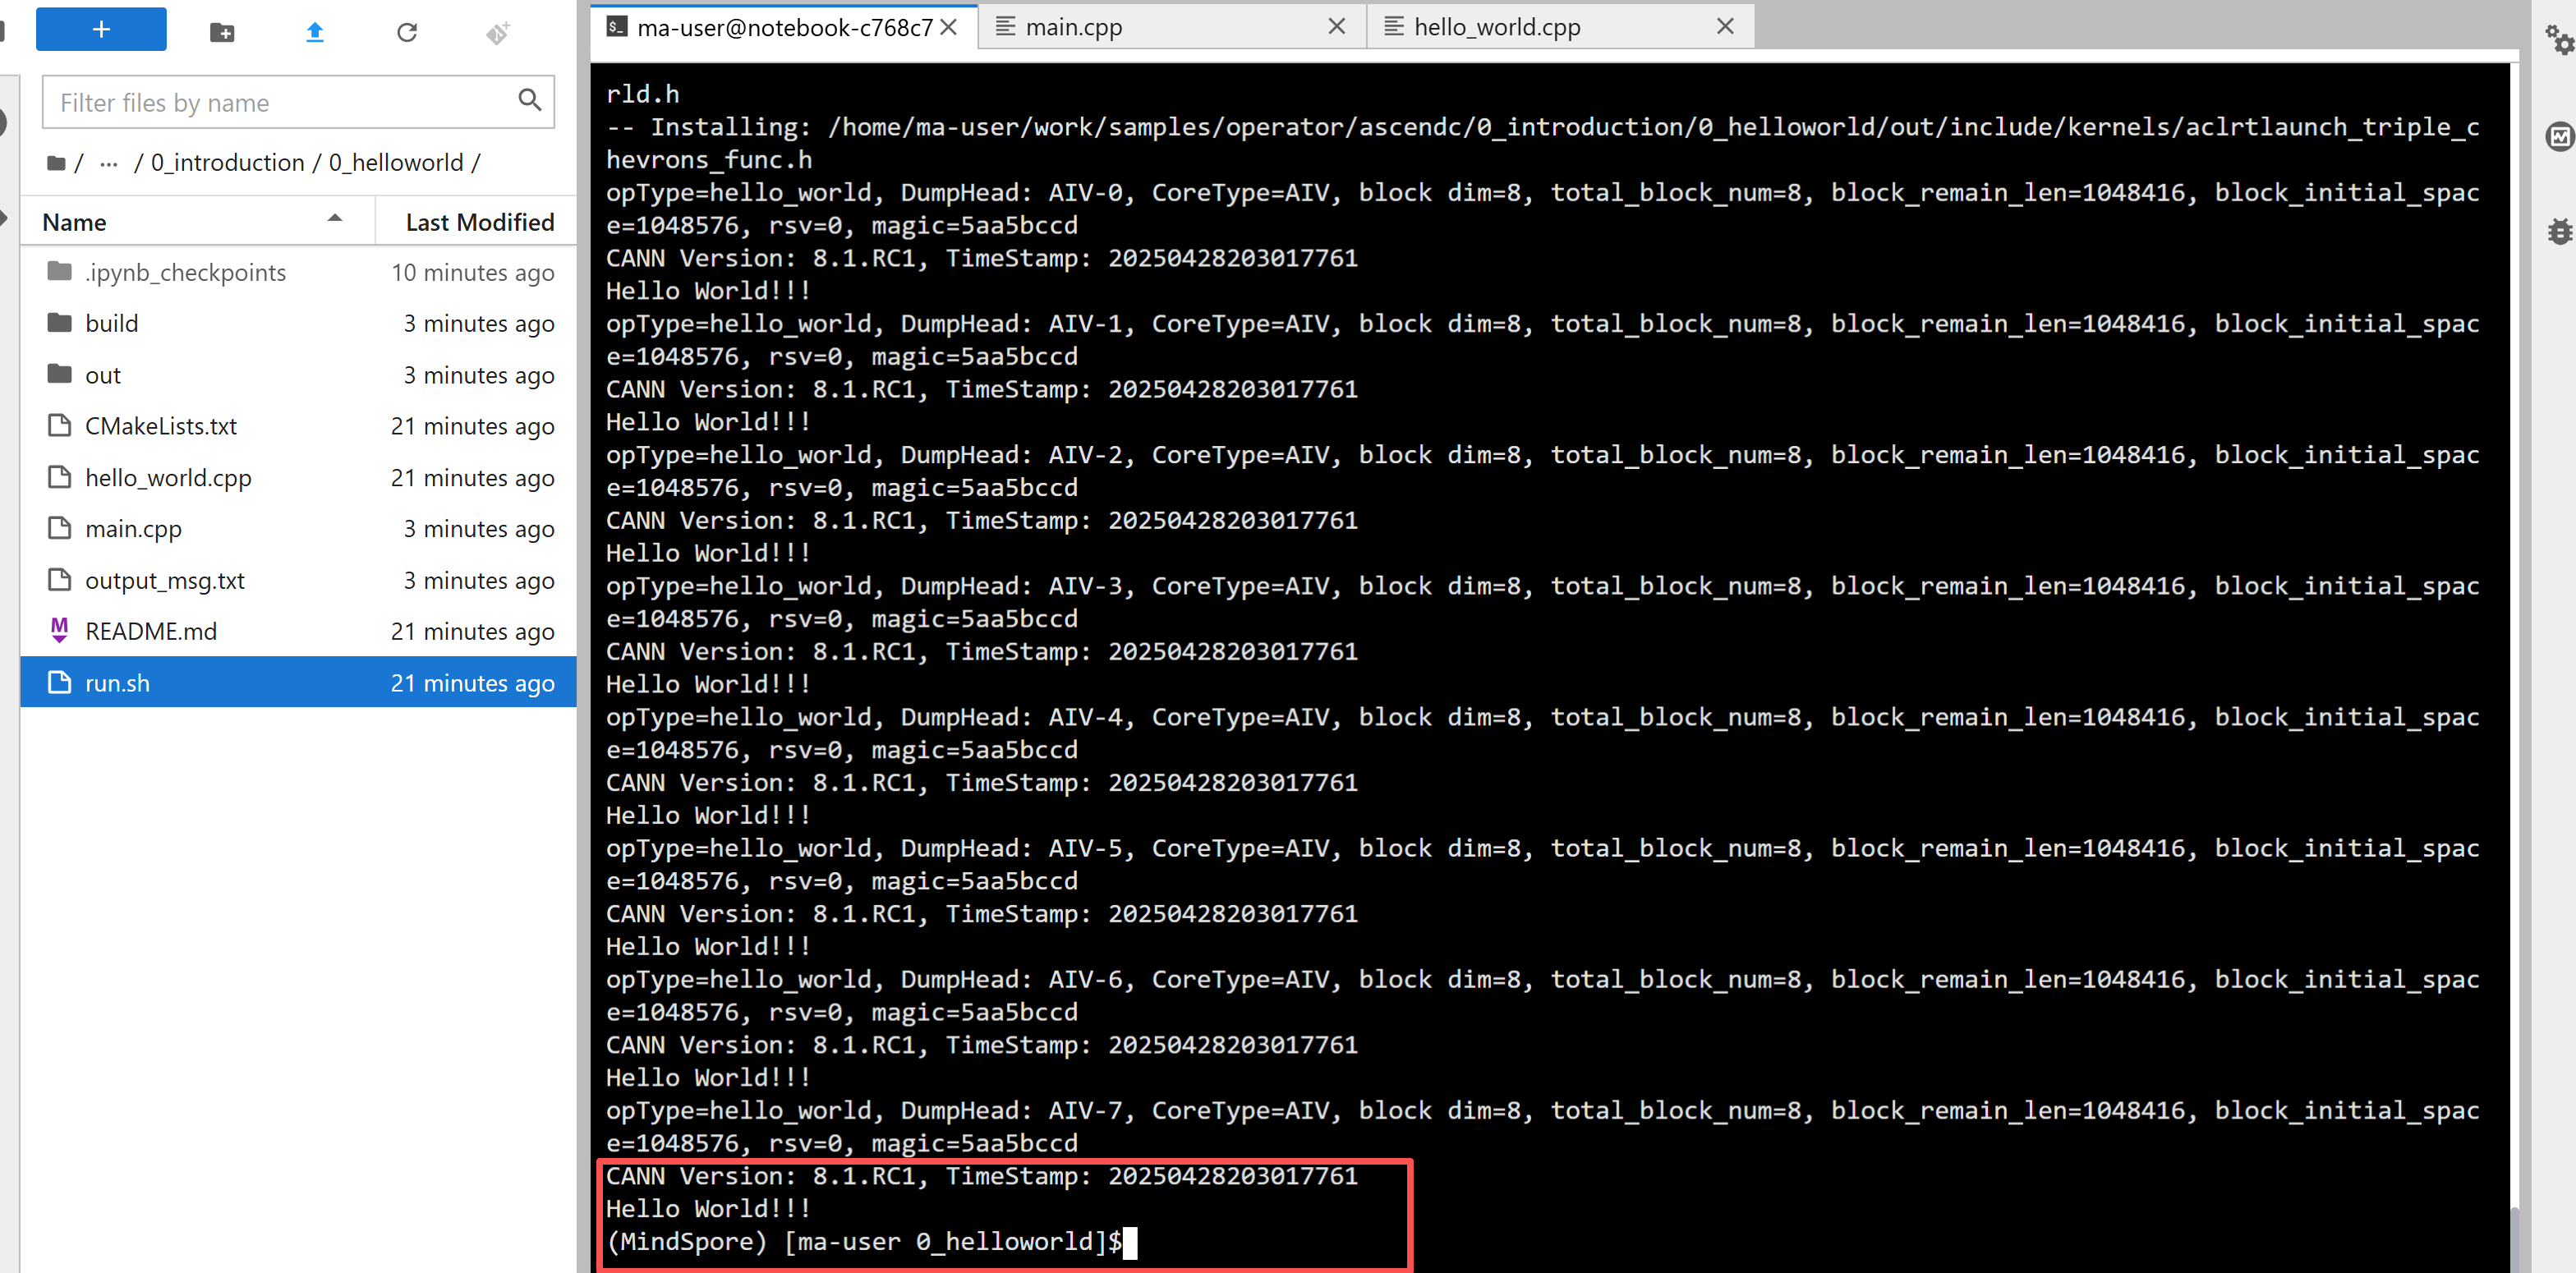
运行成功后会看到8个Core都打印了"Hello World!!!",说明环境正常,核函数能跑。
7.2 Add算子:第一个真正的计算算子
7.2.1 项目概述
Add算子是元素级算子,实现两个输入张量相加。这是最基础的算子,但包含了Ascend C算子开发的所有核心要素:数据加载、计算、结果写回、流水线处理。
7.2.2 代码结构分析
基于samples中的1_add_frameworklaunch示例,Add算子的实现采用了类封装的方式:
#include "kernel_operator.h"
constexpr int32_t BUFFER_NUM = 2; // 每个队列的tensor数量

class KernelAdd {
public:
    __aicore__ inline KernelAdd() {}

    // 初始化函数
    __aicore__ inline void Init(GM_ADDR x, GM_ADDR y, GM_ADDR z,
                                 uint32_t totalLength, uint32_t tileNum)
    {
        // 计算每个Core要处理的数据长度
        this->blockLength = totalLength / AscendC::GetBlockNum();
        this->tileNum = tileNum;
        this->tileLength = this->blockLength / tileNum / BUFFER_NUM;

        // 设置GlobalTensor,每个Core处理不同的数据块
        xGm.SetGlobalBuffer((__gm__ DTYPE_X *)x +
                           this->blockLength * AscendC::GetBlockIdx(),
                           this->blockLength);
        yGm.SetGlobalBuffer((__gm__ DTYPE_Y *)y +
                           this->blockLength * AscendC::GetBlockIdx(),
                           this->blockLength);
        zGm.SetGlobalBuffer((__gm__ DTYPE_Z *)z +
                           this->blockLength * AscendC::GetBlockIdx(),
                           this->blockLength);

        // 初始化Pipe和Queue,用于流水线处理
        pipe.InitBuffer(inQueueX, BUFFER_NUM,
                       this->tileLength * sizeof(DTYPE_X));
        pipe.InitBuffer(inQueueY, BUFFER_NUM,
                       this->tileLength * sizeof(DTYPE_Y));
        pipe.InitBuffer(outQueueZ, BUFFER_NUM,
                       this->tileLength * sizeof(DTYPE_Z));
    }

    // 主处理流程
    __aicore__ inline void Process()
    {
        int32_t loopCount = this->tileNum * BUFFER_NUM;
        for (int32_t i = 0; i < loopCount; i++) {
            CopyIn(i);   // 数据加载
            Compute(i);  // 计算
            CopyOut(i);  // 结果写回
        }
    }

private:
    // 数据加载
    __aicore__ inline void CopyIn(int32_t progress)
    {
        // 从Queue分配LocalTensor
        AscendC::LocalTensor<DTYPE_X> xLocal = inQueueX.AllocTensor<DTYPE_X>();
        AscendC::LocalTensor<DTYPE_Y> yLocal = inQueueY.AllocTensor<DTYPE_Y>();

        // 从Global Memory拷贝到Local Memory
        AscendC::DataCopy(xLocal, xGm[progress * this->tileLength],
                         this->tileLength);
        AscendC::DataCopy(yLocal, yGm[progress * this->tileLength],
                         this->tileLength);

        // 放入Queue
        inQueueX.EnQue(xLocal);
        inQueueY.EnQue(yLocal);
    }

    // 计算
    __aicore__ inline void Compute(int32_t progress)
    {
        // 从Queue取出数据
        AscendC::LocalTensor<DTYPE_X> xLocal = inQueueX.DeQue<DTYPE_X>();
        AscendC::LocalTensor<DTYPE_Y> yLocal = inQueueY.DeQue<DTYPE_Y>();
        AscendC::LocalTensor<DTYPE_Z> zLocal = outQueueZ.AllocTensor<DTYPE_Z>();

        // 向量加法
        AscendC::Add(zLocal, xLocal, yLocal, this->tileLength);

        // 结果放入Queue
        outQueueZ.EnQue<DTYPE_Z>(zLocal);

        // 释放输入tensor
        inQueueX.FreeTensor(xLocal);
        inQueueY.FreeTensor(yLocal);
    }

    // 结果写回
    __aicore__ inline void CopyOut(int32_t progress)
    {
        // 从Queue取出结果
        AscendC::LocalTensor<DTYPE_Z> zLocal = outQueueZ.DeQue<DTYPE_Z>();

        // 从Local Memory拷贝到Global Memory
        AscendC::DataCopy(zGm[progress * this->tileLength], zLocal,
                         this->tileLength);

        // 释放tensor
        outQueueZ.FreeTensor(zLocal);
    }

private:
    AscendC::TPipe pipe;  // 管道,管理内存和同步
    AscendC::TQue<AscendC::TPosition::VECIN, BUFFER_NUM> inQueueX, inQueueY;  // 输入队列
    AscendC::TQue<AscendC::TPosition::VECOUT, BUFFER_NUM> outQueueZ;  // 输出队列
    AscendC::GlobalTensor<DTYPE_X> xGm;  // Global Memory中的输入x
    AscendC::GlobalTensor<DTYPE_Y> yGm;  // Global Memory中的输入y
    AscendC::GlobalTensor<DTYPE_Z> zGm;  // Global Memory中的输出z
    uint32_t blockLength;  // 每个Core处理的数据长度
    uint32_t tileNum;     // Tile数量
    uint32_t tileLength;  // 每个Tile的长度
};

// 核函数入口
extern "C" __global__ __aicore__ void add_custom(
    GM_ADDR x, GM_ADDR y, GM_ADDR z,
    GM_ADDR workspace, GM_ADDR tiling)
{
    GET_TILING_DATA(tiling_data, tiling);
    KernelAdd op;
    op.Init(x, y, z, tiling_data.totalLength, tiling_data.tileNum);
    op.Process();
}
7.2.3 关键概念解析
TPipe和TQue:这是Ascend C的流水线编程模型。TPipe管理内存,TQue是队列,用于不同阶段之间的数据传递。BUFFER_NUM=2表示双缓冲,可以一边加载下一块数据,一边计算当前块数据,实现流水线。
数据分块(Tiling):大数据要分成多个Tile处理,每个Tile在Local Memory中计算。tileNum控制分多少块,tileLength是每块的大小。
多核并行:每个Core通过GetBlockIdx()获取自己的ID,处理不同的数据块。blockLength是每个Core要处理的数据长度。
流水线处理:CopyIn、Compute、CopyOut三个阶段可以流水线化,提高性能。
7.2.4 FrameworkLaunch vs KernelLaunch
Add算子有两种调用方式:
FrameworkLaunch:通过框架调用,需要创建完整的算子工程,包括host侧实现、算子注册等。适合集成到深度学习框架中。
KernelLaunch:直接调用核函数,更简单直接。适合快速验证和测试。
两种方式各有优缺点,FrameworkLaunch功能完整但复杂,KernelLaunch简单但功能有限。
7.3 MatMul算子:矩阵乘法实现
7.3.1 项目概述
MatMul是深度学习中最常用的算子,实现矩阵乘法 C = A * B + Bias。这个算子比Add复杂得多,需要用到Cube Unit(矩阵运算单元),还要处理分块、多核并行等。
7.3.2 代码结构分析
基于samples中的10_matmul_frameworklaunch示例,MatMul算子使用了高阶API:
#include "kernel_operator.h"
#include "lib/matmul_intf.h"  // MatMul高阶API

using namespace matmul;

template <typename aType, typename bType, typename cType, typename biasType>
class MatmulKernel {
public:
    __aicore__ inline MatmulKernel(){};

    // 初始化
    __aicore__ inline void Init(GM_ADDR a, GM_ADDR b, GM_ADDR bias,
                                GM_ADDR c, GM_ADDR workspace,
                                uint64_t memSize, const TCubeTiling &tiling)
    {
        this->tiling = tiling;
        this->localMemSize = memSize;

        // 设置GlobalTensor
        aGlobal.SetGlobalBuffer(reinterpret_cast<__gm__ aType *>(a),
                               tiling.M * tiling.Ka);
        bGlobal.SetGlobalBuffer(reinterpret_cast<__gm__ bType *>(b),
                               tiling.Kb * tiling.N);
        cGlobal.SetGlobalBuffer(reinterpret_cast<__gm__ cType *>(c),
                               tiling.M * tiling.N);
        biasGlobal.SetGlobalBuffer(reinterpret_cast<__gm__ biasType *>(bias),
                                  tiling.N);

        // 计算当前Core的数据偏移
        int32_t offsetA = 0, offsetB = 0, offsetC = 0, offsetBias = 0;
        CalcOffset(GetBlockIdx(), tiling, offsetA, offsetB, offsetC, offsetBias);

        // 设置偏移后的GlobalTensor
        aGlobal = aGlobal[offsetA];
        bGlobal = bGlobal[offsetB];
        cGlobal = cGlobal[offsetC];
        biasGlobal = biasGlobal[offsetBias];
    }

    // 主处理流程
    template <bool setTmpSpace = false>
    __aicore__ inline void Process(AscendC::TPipe *pipe)
    {
        // 单核场景,只让第一个Core执行
        if (GetBlockIdx() >= 1) {
            return;
        }

        // 如果需要临时空间,分配
        if constexpr (setTmpSpace) {
            AscendC::TBuf<> tmpMMFormatUb;
            AscendC::LocalTensor<uint8_t> mmformatUb;
            pipe->InitBuffer(tmpMMFormatUb, localMemSize);
            mmformatUb = tmpMMFormatUb.Get<uint8_t>(localMemSize);
            matmulObj.SetLocalWorkspace(mmformatUb);
        }

        // 设置输入输出
        matmulObj.SetTensorA(aGlobal);
        matmulObj.SetTensorB(bGlobal);
        matmulObj.SetBias(biasGlobal);

        // 执行矩阵乘法
        matmulObj.IterateAll(cGlobal);
        matmulObj.End();
    }

    // 计算数据偏移
    __aicore__ inline void CalcOffset(int32_t blockIdx, const TCubeTiling &tiling,
                                      int32_t &offsetA, int32_t &offsetB,
                                      int32_t &offsetC, int32_t &offsetBias)
    {
        // 根据blockIdx计算在M和N维度上的位置
        auto mSingleBlocks = Ceiling(tiling.M, tiling.singleCoreM);
        auto mCoreIndx = blockIdx % mSingleBlocks;
        auto nCoreIndx = blockIdx / mSingleBlocks;

        // 计算各矩阵的偏移
        offsetA = mCoreIndx * tiling.Ka * tiling.singleCoreM;
        offsetB = nCoreIndx * tiling.singleCoreN;
        offsetC = mCoreIndx * tiling.N * tiling.singleCoreM +
                  nCoreIndx * tiling.singleCoreN;
        offsetBias = nCoreIndx * tiling.singleCoreN;
    }

    // MatMul对象,使用高阶API
    Matmul<MatmulType<AscendC::TPosition::GM, CubeFormat::ND, aType>,
           MatmulType<AscendC::TPosition::GM, CubeFormat::ND, bType>,
           MatmulType<AscendC::TPosition::GM, CubeFormat::ND, cType>,
           MatmulType<AscendC::TPosition::GM, CubeFormat::ND, biasType>> matmulObj;

    AscendC::GlobalTensor<aType> aGlobal;
    AscendC::GlobalTensor<bType> bGlobal;
    AscendC::GlobalTensor<cType> cGlobal;
    AscendC::GlobalTensor<biasType> biasGlobal;
    TCubeTiling tiling;
    uint64_t localMemSize = 0;
};

// 核函数入口
extern "C" __global__ __aicore__ void matmul_custom(
    GM_ADDR a, GM_ADDR b, GM_ADDR bias, GM_ADDR c,
    GM_ADDR workspace, GM_ADDR tiling)
{
    GET_TILING_DATA(tilingData, tiling);
    MatmulKernel<half, half, float, float> matmulKernel;
    AscendC::TPipe pipe;

    // 注册MatMul对象
    REGIST_MATMUL_OBJ(&pipe, GetSysWorkSpacePtr(),
                     matmulKernel.matmulObj,
                     &tilingData.cubeTilingData);

    matmulKernel.Init(a, b, bias, c, workspace,
                     tilingData.localMemSize,
                     tilingData.cubeTilingData);

    // 根据Tiling Key选择不同的处理路径
    if (TILING_KEY_IS(1)) {
        matmulKernel.Process(&pipe);
    } else if (TILING_KEY_IS(2)) {
        matmulKernel.Process<true>(&pipe);  // 需要临时空间
    }
}
7.3.3 关键概念解析
MatMul高阶API:Ascend C提供了MatMul的高阶API,封装了矩阵乘法的复杂逻辑,包括分块、Cube Unit调用等。用高阶API比用基础API简单很多。
TCubeTiling:矩阵乘法的Tiling结构,包含M、N、K维度信息,以及每个Core要处理的M和N的大小。
多核分块:矩阵乘法可以按M和N维度分块,不同的Core处理不同的块。CalcOffset函数计算每个Core要处理的数据偏移。
Tiling Key:不同的Tiling策略对应不同的Key,根据Key选择不同的处理路径。比如有些情况需要临时空间,有些不需要。
单核vs多核:示例中有单核和多核两种实现。单核实现简单,多核实现复杂但性能更好。
7.4 MatMulLeakyRelu:融合算子实现
7.4.1 项目概述
MatMulLeakyRelu是融合算子,把矩阵乘法和LeakyRelu激活函数融合在一起。融合的好处是减少内存访问,中间结果不用写回Global Memory,直接在Local Memory上做LeakyRelu。
7.4.2 代码结构分析
基于samples中的12_matmulleakyrelu_frameworklaunch示例,融合算子的实现:
#include "kernel_operator.h"
#include "lib/matmul_intf.h"

template <typename aType, typename bType, typename cType, typename biasType>
class MatmulLeakyKernel {
public:
    __aicore__ inline MatmulLeakyKernel(){};

    // 初始化
    __aicore__ inline void Init(GM_ADDR a, GM_ADDR b, GM_ADDR bias,
                                GM_ADDR c, GM_ADDR workspace,
                                const TCubeTiling &tiling, float alpha,
                                AscendC::TPipe *pipe)
    {
        this->tiling = tiling;
        this->alpha = alpha;

        // 设置GlobalTensor(和MatMul类似)
        aGlobal.SetGlobalBuffer(...);
        bGlobal.SetGlobalBuffer(...);
        cGlobal.SetGlobalBuffer(...);
        biasGlobal.SetGlobalBuffer(...);

        // 计算偏移
        CalcOffset(GetBlockIdx(), tiling, offsetA, offsetB, offsetC, offsetBias);

        // 初始化LeakyRelu的输出队列
        pipe->InitBuffer(reluOutQueue_, 1,
                        tiling.baseM * tiling.baseN * sizeof(cType));

        matmulObj.SetOrgShape(tiling.M, tiling.N, tiling.Ka, tiling.Kb);
    }

    // 主处理流程
    template <bool setTmpSpace = false>
    __aicore__ inline void Process(AscendC::TPipe *pipe)
    {
        if (GetBlockIdx() >= tiling.usedCoreNum) {
            return;
        }

        // 设置临时空间(如果需要)
        if constexpr (setTmpSpace) {
            // ...
        }

        // 设置MatMul的输入
        matmulObj.SetTensorA(aGlobal);
        matmulObj.SetTensorB(bGlobal);
        matmulObj.SetBias(biasGlobal);

        uint32_t computeRound = 0;
        // 迭代计算,每次计算baseM * baseN
        while (matmulObj.template Iterate<true>()) {
            MatmulCompute();      // 获取MatMul结果
            LeakyReluCompute();   // 计算LeakyRelu
            CopyOut(computeRound); // 写回结果
            computeRound++;
        }
        matmulObj.End();
    }

    // MatMul计算,结果存到LocalTensor
    __aicore__ inline void MatmulCompute()
    {
        reluOutLocal = reluOutQueue_.AllocTensor<cType>();
        // 获取MatMul的结果,直接存到LocalTensor,不写回Global
        matmulObj.template GetTensorC<true>(reluOutLocal, false, true);
    }

    // LeakyRelu计算
    __aicore__ inline void LeakyReluCompute()
    {
        // 在LocalTensor上直接做LeakyRelu
        LeakyRelu(reluOutLocal, reluOutLocal, (cType)alpha,
                 tiling.baseM * tiling.baseN);
        reluOutQueue_.EnQue(reluOutLocal);
    }

    // 写回结果
    __aicore__ inline void CopyOut(uint32_t count)
    {
        reluOutQueue_.DeQue<cType>();

        // 计算写回的偏移和参数
        const uint32_t roundM = Ceiling(tiling.singleCoreM, tiling.baseM);
        uint32_t startOffset = (count % roundM * tiling.baseM * tiling.N +
                               count / roundM * tiling.baseN);

        // 写回Global Memory
        DataCopyParams copyParam = {...};
        DataCopy(cGlobal[startOffset], reluOutLocal, copyParam);
        reluOutQueue_.FreeTensor(reluOutLocal);
    }

private:
    Matmul<..., MatmulType<AscendC::TPosition::VECIN, ...>> matmulObj;  // 注意输出是VECIN
    AscendC::LocalTensor<cType> reluOutLocal;  // LeakyRelu的输入输出
    AscendC::TQue<AscendC::TPosition::VECOUT, 1> reluOutQueue_;  // 输出队列
    float alpha;  // LeakyRelu的参数
    // ...
};

// 核函数入口
extern "C" __global__ __aicore__ void matmul_leakyrelu_custom(
    GM_ADDR a, GM_ADDR b, GM_ADDR bias, GM_ADDR c,
    GM_ADDR workspace, GM_ADDR tiling)
{
    GET_TILING_DATA(tilingData, tiling);
    MatmulLeakyKernel<half, half, float, float> matmulLeakyKernel;
    AscendC::TPipe pipe;

    REGIST_MATMUL_OBJ(&pipe, GetSysWorkSpacePtr(),
                     matmulLeakyKernel.matmulObj,
                     &tilingData.cubeTilingData);

    matmulLeakyKernel.Init(a, b, bias, c, workspace,
                          tilingData.cubeTilingData,
                          tilingData.alpha, &pipe);

    if (TILING_KEY_IS(1)) {
        matmulLeakyKernel.Process(&pipe);
    } else if (TILING_KEY_IS(2)) {
        matmulLeakyKernel.Process<true>(&pipe);
    }
}
7.4.3 融合的关键点
输出位置改为VECIN:MatMul的输出位置从GM改为VECIN,这样结果直接输出到LocalTensor,不用写回Global Memory。
迭代计算:用Iterate()方法迭代计算,每次计算一小块(baseM * baseN),计算完立即做LeakyRelu,然后写回。
数据流:MatMul结果 → LocalTensor → LeakyRelu → 写回Global Memory。中间结果一直在Local Memory,减少内存访问。
性能优势:融合后减少了中间结果的Global Memory访问,性能提升明显。
7.5 其他重要Demo
7.5.1 非对齐数据处理
16_unaligned_abs_kernellaunch、17_unaligned_reducemin_kernellaunch等demo展示了如何处理非对齐数据。非对齐数据不能直接用向量化API,需要特殊处理,比如填充、掩码、Gather等。
7.5.2 多核并行
21_vectoradd_kernellaunch展示了多核并行的不同场景:单核、多核、多核带Tiling、多核带Broadcast等。理解这些场景有助于设计高效的并行策略。
7.5.3 静态Tensor编程
23_static_tensor_programming_kernellaunch展示了静态Tensor编程方式,这是一种新的编程模式,在某些场景下更简单高效。
7.5.4 异构混合编程
24-27的simple系列demo展示了Ascend C的异构混合编程,支持host/device代码混合,可以用.asc文件简化开发。
学习检查点
学完这一篇,你应该能做到这些:
理解Hello World示例,知道如何写最简单的核函数。理解Add算子的实现,掌握TPipe、TQue、流水线等核心概念。理解MatMul算子的实现,知道如何使用高阶API。理解融合算子的实现,知道如何减少内存访问。能够参考samples中的demo,实现自己的算子。
实践练习
运行Hello World:在ModelArts Notebook中运行0_helloworld示例,验证环境正常。
运行Add算子:运行1_add_frameworklaunch或3_add_kernellaunch示例,理解元素级算子的实现。
运行MatMul算子:运行10_matmul_frameworklaunch示例,理解矩阵乘法的实现。
运行融合算子:运行12_matmulleakyrelu_frameworklaunch示例,理解算子融合的方法。
修改示例:尝试修改Add算子,改成Mul或Sub算子,加深理解。
实现新算子:参考Add算子,实现一个ReLU算子,完成从编写到测试的全流程。
下一步:掌握了实战项目后,你已经具备了独立开发Ascend C算子的能力。可以继续深入学习高级特性、最佳实践,或者在实际项目中应用这些知识。
2025年昇腾CANN训练营第二季,基于CANN开源开放全场景,推出0基础入门系列、码力全开特辑、开发者案例等专题课程,助力不同阶段开发者快速提升算子开发技能。获得Ascend C算子中级认证,即可领取精美证书,完成社区任务更有机会赢取华为手机,平板、开发板等大奖。
报名链接:https://www.hiascend.com/developer/activities/cann20252
社区地址:https://www.hiascend.com/developer

鲲鹏昇腾开发者社区是面向全社会开放的“联接全球计算开发者,聚合华为+生态”的社区,内容涵盖鲲鹏、昇腾资源,帮助开发者快速获取所需的知识、经验、软件、工具、算力,支撑开发者易学、好用、成功,成为核心开发者。
更多推荐
 22
22 0
0- 0


 已为社区贡献17条内容

所有评论(0)