
openGauss的DMind在x86系统上的安装(全网当前唯一解读)---解决DBMind安装和启动报错
X86环境下openGauss(6.0.0LTS版本)中安装DBMind,其中还有安装node-exporter、openGauss_exporter、prometheus、reprocessing_exporter(安装prometheus后自动会安装),上面这些组件的功能可以去官网文档查找其功能。接下来,解压下载的安装包,并使用sh命令安装解压出来的sh类型的文件,安装过程中会提示确认安装位置
X86环境下openGauss(6.0.0LTS版本)中安装DBMind,其中还有安装node-exporter、openGauss_exporter、prometheus、reprocessing_exporter(安装prometheus后自动会安装),上面这些组件的功能可以去官网文档查找其功能。
一、安装DBMind。
omm用户环境下:
[omm@openGauss01 ~]$ wget https://openGauss.obs.cn-south-1.myhuaweicloud.com/6.0.0/dbmind/x86/dbmind-installer-x86_64.tar.gz
[omm@openGauss01 ~]$ tar -zxvf dbmind-installer-x86_64.tar.gz
[omm@openGauss01 ~]$ cd dbmind-installer-x86_64
[omm@openGauss01 dbmind-installer-x86_64]$ sh dbmind-installer-x86_64-python3.12.sh 说明:直接使用omm用户下载DBMind,该文件用户是omm,用户组是dbgrp。接下来,解压下载的安装包,并使用sh命令安装解压出来的sh类型的文件,安装过程中会提示确认安装位置和添加环境变量,按照提示输入回车或yes即可。
接下来,重新加载环境变量:[omm@openGauss01 dbmind-installer-x86_64]$ source ~/.bashrc关键部分:使用命令gs_dbmind测试是否安装成功,此时会报错:

根据报错内容的提示,进行安装,但在安装之前,为了能让安装软件更加顺利,需要先进行pip源的更换:
[omm@openGauss01 dbmind-installer-x86_64]$ mkdir ~/.pip/
[omm@openGauss01 dbmind-installer-x86_64]$ vim ~/.pip/pip.conf
#换源内容
[global]
index-url = http://mirrors.aliyun.com/pypi/simple/
trusted-host = mirrors.aliyun.com
timeout = 120
[omm@openGauss01 dbmind-installer-x86_64]$  /home/omm/openGauss-DBMind/python/bin/python3 -m pip install -r /home/omm/openGauss-DBMind/requirements-x86.txt
再次执行gs_dbmind --help还会出现前面同样的报错信息,这是因为在gs_mind中对文件的要求是prometheus-client这种具有短横线“-”的文件,而实际存在的是 prometheus_client这种下划线“_”的文件,所以需要对gs_dbmind中extract_libname函数进行改造:
[omm@openGauss01 dbmind-installer-x86_64]$ vim /home/omm/openGauss-DBMind/gs_dbmind
#将gs_mind文件中的以下内容
  # trim
  libname=$(echo $libname | sed 's/ *$//g')
  echo $libname


#替换为以下内容
  # 关键修改:同时处理连字符和下划线的双向转换,生成两种可能的名称
  libname_dash=${libname//_/-}  # 下划线转连字符(适配PyPI包名)
  libname_underscore=${libname//-/_}  # 连字符转下划线(适配模块名)

  # trim
  libname_dash=$(echo $libname_dash | sed 's/ *$//g')
  libname_underscore=$(echo $libname_underscore | sed 's/ *$//g')

  # 返回两种可能的名称,用空格分隔
  echo "$libname_dash $libname_underscore"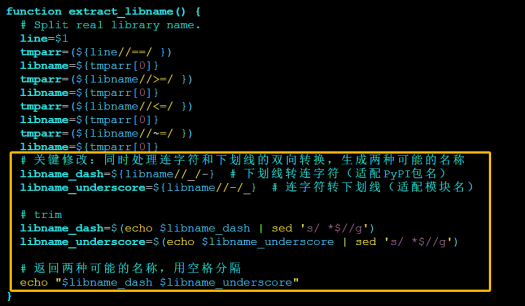
同时,修改依赖检查的匹配逻辑(找到while read line; do循环中的匹配部分)(一共两处,都进行修改):
将语句行:
found=$(echo $installed_list | grep -i "$libname")

替换为: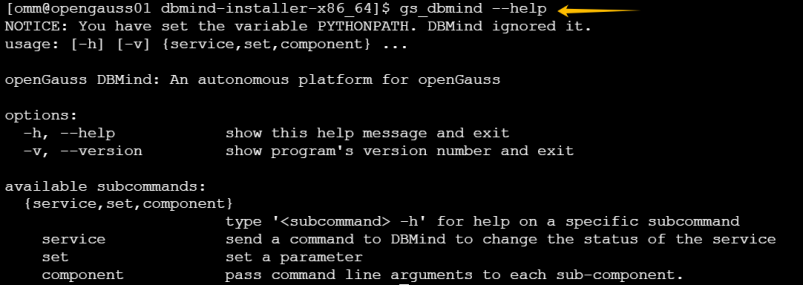
found=$(echo $installed_list | grep -i -E "$libname_dash|$libname_underscore")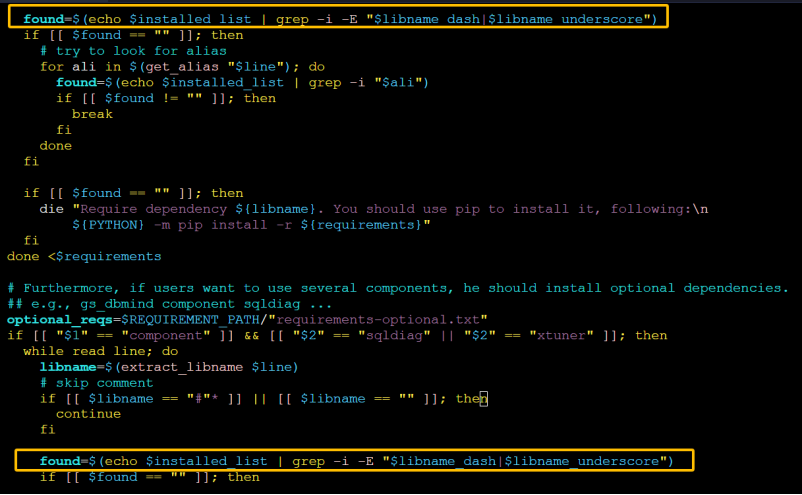 此时,再输入gs_dbmind --help进行测试,命令及正确执行的结果如下图:
二、初始化DBMind时,要改动的配置。
在node-exporter、openGauss_exporter、prometheus、reprocessing_exporter都正常启动后(配置过程就可以根据官方文档进行配置,没有什么可以特别交代的),初始化DBMind会出现报错:
[omm@openGauss01 openGauss-DBMind]$ gs_dbmind service setup --initialize -c dbmindconf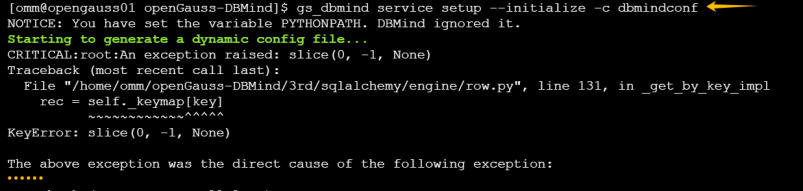
此时需要修改/home/omm/openGauss-DBMind/3rd/sqlalchemy/orm/persistence.py文件中切片逻辑:
[omm@openGauss01 openGauss-DBMind]$ vim /home/omm/openGauss-DBMind/3rd/sqlalchemy/orm/persistence.py
#找到第2410行(根据报错堆栈确认行数),将原代码:
 (row[0:-1], row[-1]) for row in matched_rows

#替换为:
(list(row)[0:-1], list(row)[-1]) for row in matched_rows
修改并保存后,再次初始化DBMind服务,正确执行如下图:

接下来可以启动DBMind服务,然后使用netstat查看8080端口是否处于监听:
[omm@openGauss01 openGauss-DBMind]$ gs_dbmind service start -c dbmindconf
[omm@openGauss01 openGauss-DBMind]$ netstat -anp|grep 8080
成功运行结果如下:

浏览器访问DBMind: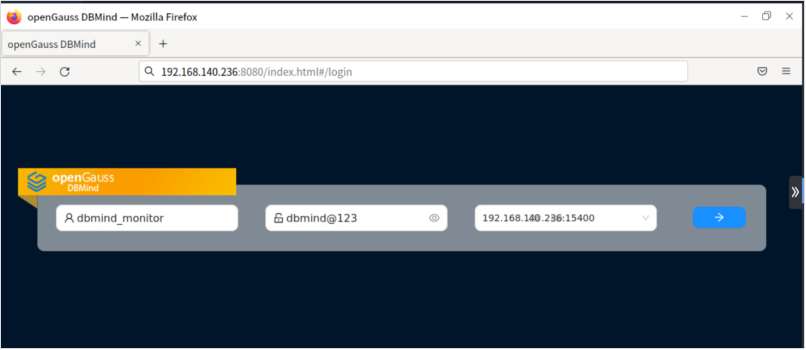

鲲鹏昇腾开发者社区是面向全社会开放的“联接全球计算开发者,聚合华为+生态”的社区,内容涵盖鲲鹏、昇腾资源,帮助开发者快速获取所需的知识、经验、软件、工具、算力,支撑开发者易学、好用、成功,成为核心开发者。
更多推荐

 5
5 0
0- 0


 已为社区贡献1条内容

所有评论(0)